Nail Supply
Rubber Base Gel vs Builder Gel Application: Avoid These Common Mistakes
Jan
When it comes to rubber base gel vs builder gel application, your technique can make all the difference. Getting a smooth, strong finish hinges on steps like surface prep, proper curing, and choosing the right formula from brands like DND, OPI, and Cuccio. In this review, you’ll avoid common mistakes and learn how to apply both gels like a pro.
Compare Gel Applications

What Is Rubber Base Gel?
Rubber base gel is a flexible foundation designed to adhere strongly to natural nails. It’s self-leveling, easy to shape, and offers moderate strength for thin overlays and gentle extensions.
What Is Builder Gel?
Builder gel is thicker, offering structural support and shaping for longer enhancements. Its robust formula holds arches and tips with minimal filing.
Key Application Differences
Rubber base gel cures to a tacky finish that’s ready for color, while builder gel requires precise layering to sculpt and reinforce. For a detailed side-by-side view, check our rubber base gel vs builder gel pros and cons.
Prep Nail Surfaces
Clean And Dehydrate
Start by removing polish, oils, and moisture. Use 99% isopropyl alcohol or a dedicated dehydrator. This step prevents lifting and ensures full adhesion.
Shape And Buff
File the free edge to your desired shape, then gently buff the nail plate. Remove shine but avoid over-buffing, which can weaken nails over time.
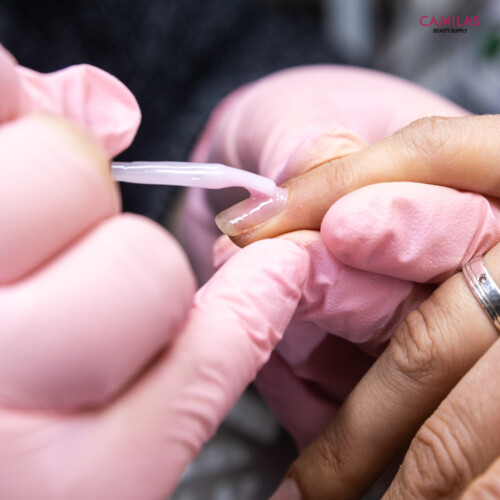
Apply Rubber Base Gel
Use Thin Base Coat
Apply a thin, even layer of rubber base gel from the cuticle to the free edge. Avoid flooding the cuticle line; a narrow bead gives you control.
Common Rubber Base Errors
- Overloading the brush, which leads to pooling at the cuticle
- Skipping the tacky layer wipe, causing uneven color
- Under-curing batches, which weakens adhesion
To protect nail health, explore our rubber base gel vs builder gel nail health guide.
Apply Builder Gel
Use Controlled Beads
Place small beads of builder gel where structure is needed—at the apex, free edge, and sidewalls. Spread gently with a flat brush.
Common Builder Gel Errors
- Applying thick layers without shaping, creating high peaks
- Ignoring sidewall symmetry, which throws off the arch
- Skipping flash cures, resulting in slumping
For nail type recommendations, see rubber base gel vs builder gel nail types.
Cure And Finish Nails
Cure With Correct Lamp
Use a 36W to 48W LED lamp, curing rubber base gel for 30 seconds and builder gel for 60 seconds per layer. Confirm a tack-free surface before moving on.
File And Polish
Shape the cured gel with a 180-grit file, then refine edges with 240 grit. Wipe the nail plate, apply color or top coat, and cure again for a glossy finish.
Prevent Common Mistakes
Over Application Issues
Excess gel can cause bubbling, lifting, or cracking. Keep layers uniform and flash-cure thin applications to lock shape.
Under Curing Problems
Rushing cure times weakens the gel structure. Always follow manufacturer guidelines, especially with thicker builder gels from Luminarynailsystems and Oxilook.
Select Gel Brands
Top Rubber Base Picks
- DND Rubber Base Duo: medium viscosity, balanced strength
- Tones Base Plus: self-leveling, low odor
- Apres Moisture Lock: gentle on nails, flexible finish
- Kupainc Flexible Base: high adhesion, ideal for thin overlays
Top Builder Gel Picks
- OPI Axxium Builder Gel: professional strength, durable hold
- Oxilook Builder Extend: excellent sculpting control
- Luminarynailsystems Classic Foundation: clear finish, easy layering
- Cuccio Structure Gel: medium viscosity, long-lasting shape
You can dive deeper into cost considerations with our rubber base gel vs builder gel cost and durability insights at rubber base gel vs builder gel durability. When you’re ready to decide, head to our choose rubber base gel or builder gel guide.