Nail Supply
How to Apply DND Gel Polish Like a Pro
May
How to Apply DND Gel Polish Like a Pro: Expert Techniques and Professional Tips
Applying DND gel polish can transform your nails into a stunning work of art, but achieving a professional finish requires skill and the right techniques. In this guide, you will learn how to apply DND gel polish like a pro, covering essential preparation steps, necessary tools, and expert tips to ensure a flawless application. Many individuals struggle with achieving a salon-quality look at home, often resulting in chipping or uneven layers. This article will provide you with the knowledge to overcome these challenges, ensuring your nails look impeccable. We will explore the application process, color selection for different skin tones, and best practices for maintaining your manicure.
Essential Nail Preparation Steps
Proper nail preparation is crucial for a successful gel polish application. This process ensures that the polish adheres well and lasts longer. The key steps include:
- Cleaning Nails Thoroughly: Remove any old polish and wash your hands to eliminate oils and dirt.
- Filing and Shaping Nails: Use a nail file to shape your nails according to your preference, ensuring they are even and smooth.
- Cuticle Care: Gently push back your cuticles and remove any excess skin to create a clean canvas for the gel polish.
These preparation steps set the foundation for a beautiful gel manicure, making the subsequent application process much smoother.
Scientific studies further underscore the critical role of gentle preparation techniques, including careful cuticle work and minimal filing, in maintaining overall nail health and integrity.
Nail Health: Primers, Cuticle Care & Gel Systems
Traditional acidic primers operating at pH 2-3 gradually corrode keratin, creating microscopic damage that builds up with each application. Formulations maintaining pH 5-7 achieve bonding without chemically degrading keratin. Gentler salon approaches-careful cuticle work, minimal filing, replacing acrylics with water-based gel systems-substantially reduce mechanical damage.
Rehabilitation Strategies for Chronic Nail Fragility, 2026
Necessary Nail Care Tools
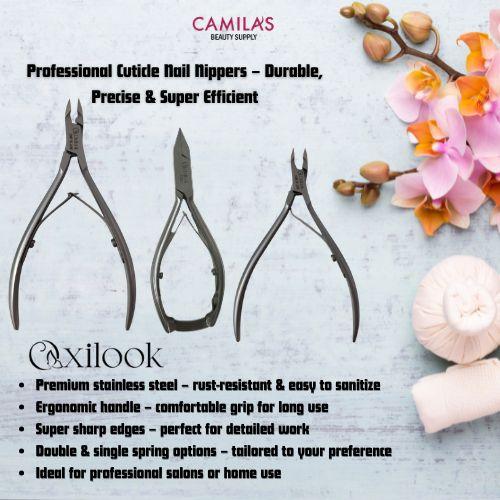
To achieve the best results when applying DND gel polish, having the right tools is essential. Here are the necessary tools you will need:
- Nail File: For shaping and smoothing the edges of your nails.
- Cuticle Remover: To help in the removal of dead skin around the nail bed.
- UV or LED Lamp: Required for curing the gel polish after application.
Having these tools on hand will streamline your application process and enhance the overall quality of your manicure.
Application Process
The application of DND gel polish involves several key steps that, when followed correctly, will yield a professional-looking finish.
- Base Coat Application: Start by applying a thin layer of DND base coat to your nails. This layer is crucial as it helps the gel polish adhere better and protects your natural nails.
- Layering Gel Polish: After curing the base coat under a UV or LED lamp, apply the first layer of your chosen DND gel polish color. Cure this layer as well, then apply a second layer for full opacity.
- Top Coat Application: Finally, apply a DND top coat to seal in the color and add shine. Cure this layer to complete the process.
Following these steps will help you achieve a smooth and even application, minimizing the risk of chipping or lifting.
How to Apply Base Coat, Color Layers, and Top Coat Correctly
Applying each layer correctly is vital for a long-lasting manicure. Here are some tips:
- Thin Layers: Always apply thin layers of base coat, color, and top coat. Thick layers can lead to uneven curing and a higher chance of lifting.
- Curing Times: Follow the manufacturer’s instructions for curing times. Typically, base and top coats require about 30 seconds to 1 minute under an LED lamp and up to 2 minutes under a UV lamp.
- Removing Sticky Residue: After curing the top coat, use a lint-free wipe and some alcohol to remove any sticky residue for a glossy finish.
These techniques will ensure that your DND gel polish application is not only beautiful but also durable.
Expert Techniques and Professional Tips
To elevate your gel polish application, consider these expert techniques:
- Applying Thin Coats: Thin coats cure more evenly and reduce the risk of bubbling.
- Curing Times: Ensure you adhere to recommended curing times for each layer to avoid issues with adhesion.
- Avoiding Common Mistakes: Be mindful of not touching the skin with the polish, as this can lead to lifting.
Implementing these tips will help you achieve a salon-quality finish at home.
Further research emphasizes the importance of precise application methods, particularly regarding thin gel layers and proper cuticle management, to ensure a safe and durable manicure.
Safe Manicure: Thin Gel Coating & Cuticle Techniques
The results obtained demonstrate that the implementation of wet cuticle processing techniques and protocols for applying thixotropic gels in a thin layer (without leveling) significantly reduces the risks
Specific Features of Training in Safe Manicure and Thin Gel Coating: Comprehensive Analysis of Methodology,
Biomechanics, And Dermatological Safety, 2026
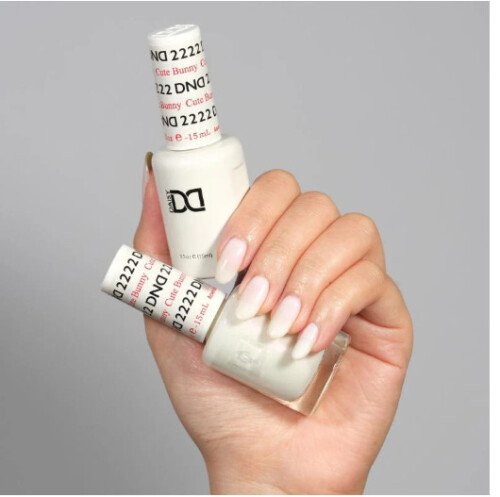
Color Selection for Different Skin Tones

Choosing the right DND gel polish color can enhance your overall look. Here are some guidelines based on skin tones:
- Fair Skin: Light pinks, soft pastels, and nude shades complement fair skin beautifully.
- Medium Skin: Rich reds, corals, and vibrant pinks can add a pop of color without overwhelming the complexion.
- Dark Skin: Deep jewel tones, bold reds, and dark purples create a striking contrast against darker skin tones.
Selecting the right color not only enhances your nails but also complements your overall appearance.
Best Practices for Achieving a Salon-Quality Finish
To maintain a professional look for your gel manicure, follow these best practices:
- Aftercare Tips: Apply cuticle oil regularly to keep your nails and cuticles hydrated.
- Avoiding Harsh Chemicals: Limit exposure to harsh chemicals that can weaken the gel polish.
- Regular Maintenance: Schedule touch-ups every 2-3 weeks to keep your manicure looking fresh.
These practices will help extend the life of your DND gel polish and keep your nails looking their best.
How to Clean and Buff Nails Before Applying DND Gel Polish
Cleaning and buffing your nails is an essential step before applying gel polish. Here’s how to do it effectively:
- Removing Old Polish: Use a non-acetone remover to gently wipe away any old polish.
- Buffing Techniques: Lightly buff the surface of your nails to create a smooth base for the gel polish.
- Final Cleansing: After buffing, wash your hands to remove any dust or debris.
This thorough cleaning process ensures that your gel polish adheres properly and lasts longer.
Which Nail Care Tools Are Needed for Optimal Preparation?
For optimal nail preparation, ensure you have the following tools:
- Cuticle Pusher: To push back cuticles effectively.
- Buffer Block: To smooth the nail surface before application.
Having these tools will enhance your preparation process and contribute to a better application.
How to Choose the Right DND Gel Polish Colors for Your Professional Look?

Selecting the right DND gel polish colors involves considering several factors:
- Personal Style: Choose colors that reflect your personality and style.
- Occasion: Consider the event or setting where you will wear the polish.
- Seasonal Trends: Stay updated on seasonal color trends to keep your look fresh.
By considering these factors, you can select colors that not only look great but also suit your lifestyle.
What Is the Step-by-Step Process to Apply DND Gel Polish Like a Pro?
To apply DND gel polish like a pro, follow this step-by-step process:
- Prepare Your Nails: Clean, file, and buff your nails.
- Apply Base Coat: Use a thin layer and cure it.
- Apply Color Layers: Apply two thin layers of your chosen color, curing each layer.
- Finish with Top Coat: Seal your manicure with a top coat and cure it.
This structured approach will help you achieve a flawless gel manicure.
What Are the Professional Gel Nail Polish Techniques for Smooth Application?
Professional techniques for smooth application include:
- Using a Quality Base Coat: A good base coat helps the polish adhere better.
- Layering Technique: Apply multiple thin layers instead of one thick layer for a smoother finish.
- Curing Properly: Ensure each layer is fully cured to avoid lifting.
These techniques will enhance the quality of your gel polish application.
What Are the Best Practices for Curing DND Gel Polish Using UV and LED Lamps?
Curing your DND gel polish correctly is essential for durability. Here are some best practices:
- Follow Manufacturer Guidelines: Always adhere to the recommended curing times for each product.
- Use the Right Lamp: Ensure your lamp is compatible with the gel polish you are using.
- Avoid Over-Curing: Curing for too long can lead to brittleness.
By following these practices, you can ensure that your gel polish cures properly and lasts longer.
How Can You Maintain and Extend the Longevity of Your DND Gel Manicure?
To maintain and extend the life of your DND gel manicure, consider these tips:
- Avoiding Harsh Chemicals: Limit exposure to cleaning products and harsh soaps.
- Regular Application of Cuticle Oil: This keeps your nails and cuticles healthy.
- Periodic Touch-Ups: Address any chips or lifting promptly to prevent further damage.
Implementing these strategies will help your manicure last longer and look great.
How to Handle Common Gel Polish Issues Like Chipping or Lifting?
If you encounter issues like chipping or lifting, here are some solutions:
- Identifying Causes of Chipping: Common causes include improper curing or applying thick layers.
- Preventive Measures: Always apply thin layers and ensure proper curing times.
- Repair Techniques: For minor chips, you can apply a small amount of polish to the affected area and cure it again.
By addressing these issues promptly, you can maintain the integrity of your gel manicure.